In this tutorial we will begin explaining the proper steps to mounting a lifesize. Instructing your client to dorsal cut his trophy is the beginning to a successful piece. In the first photo, notice the mannikin has been ordered without rods. We have wrote about this in the past. We still get questions on how important is it to do this. We never order mannikins with rods. Here we foam in a 2x4 so that it can be mounted to the stand.
Once I have established that the circumference is correct, we then foam in the block that we use for mounting purposes. If the circumference needed to be adjusted, we then split the mannikin to add or subtract materiel. We have place the block in the mannikin and it is now ready for more alteration.
Here is where a mannikin without rods become very easy to alter. The legs on this sheep were out of line and needed to be corrected before moving forward.
This is the most misunderstood procedure in taxidermy today. Not only is it misunderstood, It is ignored, and the importance is disregarded. Notice here the mannikin is 7 1/4 inches wide. The skull on this sheep measures 6 1/8 inches wide. The mannikin is 1 1/8 inches to wide. Most all Taxidermist do not reduce the head size at all. They like to say they do, but they do not even have the eye socket on the skull to measure to start with. This is why most sheep mount are odd looking and do not hit the mark.
Here we have cut the head off the mannikin and split it down the center. Notice the back has been reduce more than the front. The muzzle was to wide also by 1/4 of an inch.
Here in the photo, look at the solid block of wood that is used as a head board. This should be 1 1/8 inch plywood. Solid wood will crack over time and allow for movement of the skull and horns. This is a large well known company, and you can see that they also short cut where ever they can. Look closely at the staple used to fasten the reinforcement board to the head board. This just goes to show you that they have no intentions of the form being altered. Even our suppliers are still in the stone age. As a Taxidermist, if you plan on making a living at this; you will need to perfect the art of alteration.
I have foamed the head back together. Notice the large difference in the shape between the altered head and unaltered one.
I can now position the head on the mannikin where I would like it to be.
I have decided to give this sheep a little head roll. This will give the sheep some motion and interest.
Notice that I have the whole skull to work with. I can get all my measurements from here and transfer them to the mannikin. As taxidermists; we should always have the whole skull in front of us. Someone, somewhere started cutting skulls which has led to a very inferior and improper way of doing taxidermy. The hunter can bring back any whole skull from any place in the world. CWD has nothing to do with cutting skulls. I always use a wire brush to remove all the brain tissue from the skull and that is the only requirement. Skulls should never be cut in the field or by the hunter. NEVER!
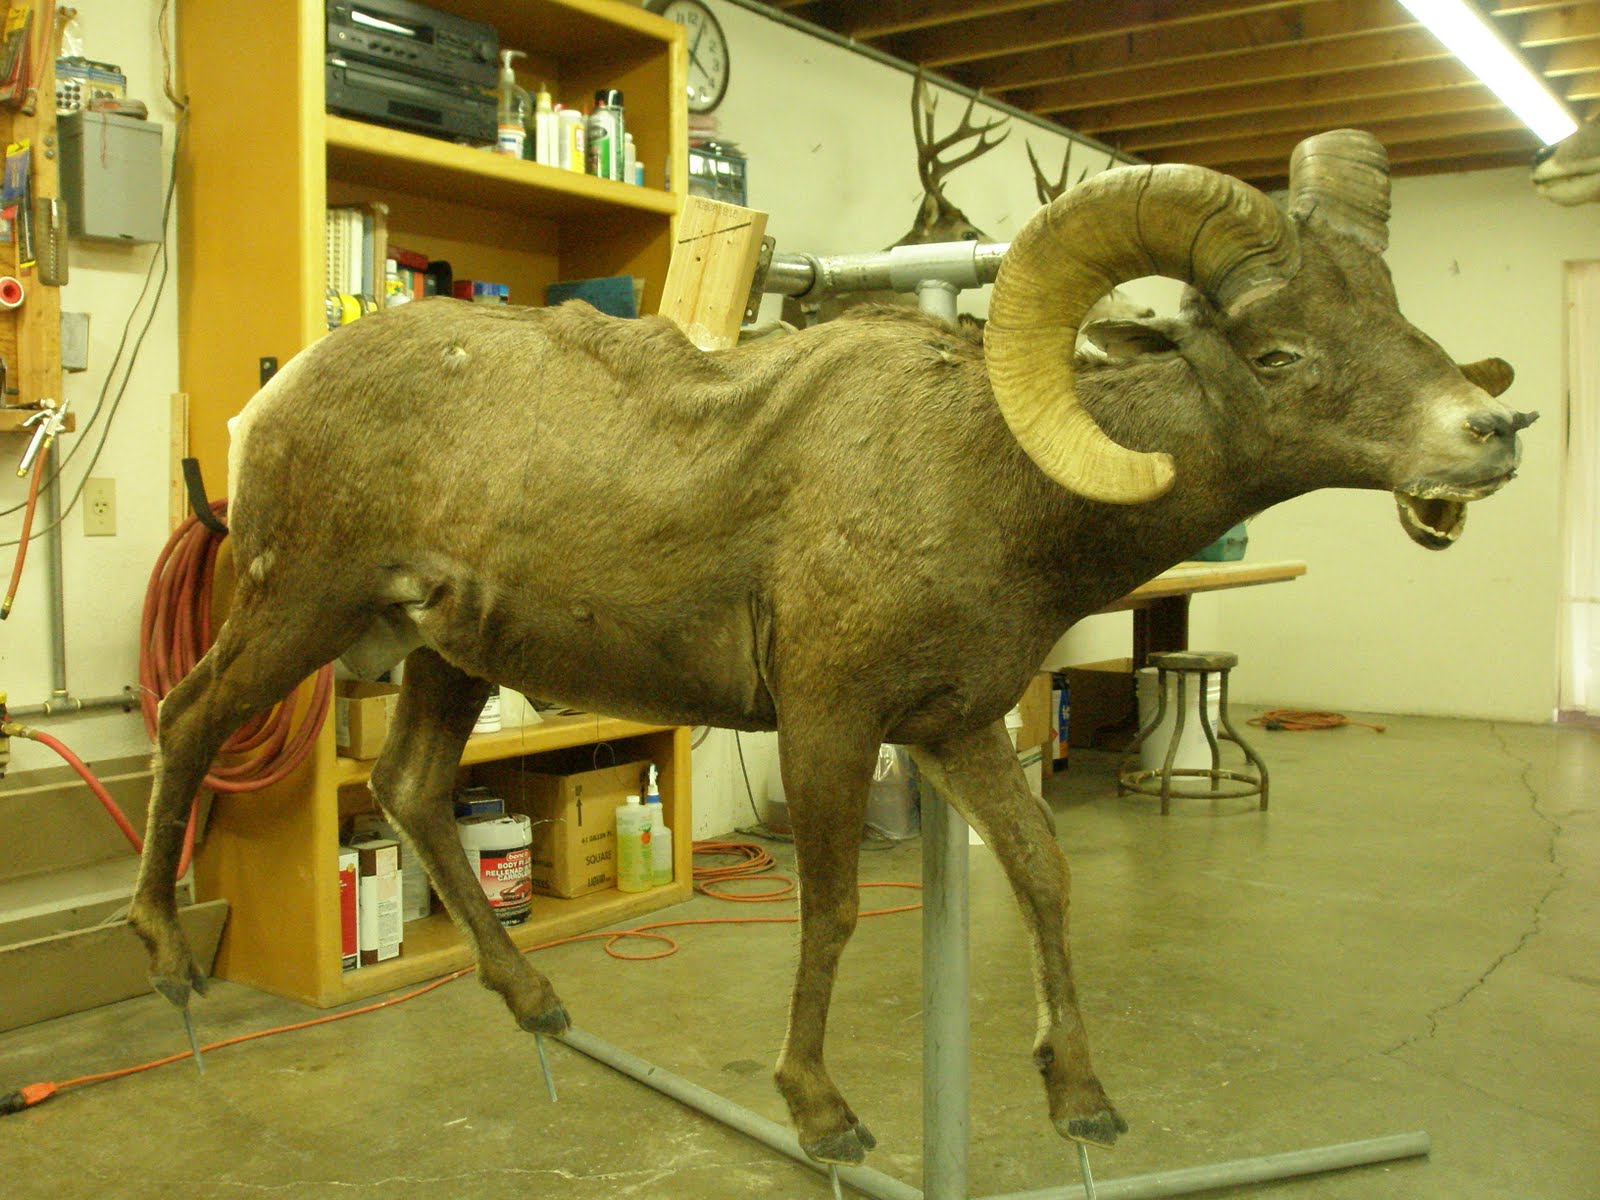
Notice the sheep is on a stand. This makes the mannikin much easier to handle.
I have begun installing the rods back into the mannikin. I have made all my leg length and circumference adjustment need for the skin to fit correctly. Applying the skin will be easy and the skin will fit perfect.
In the lower part of the leg, I use bondo to hold the rod in place. bondo is stronger and it still can be glued to.
I use a drill bit in a drill to auger out for the rods. Make this slot first and then bend the rod to fit.
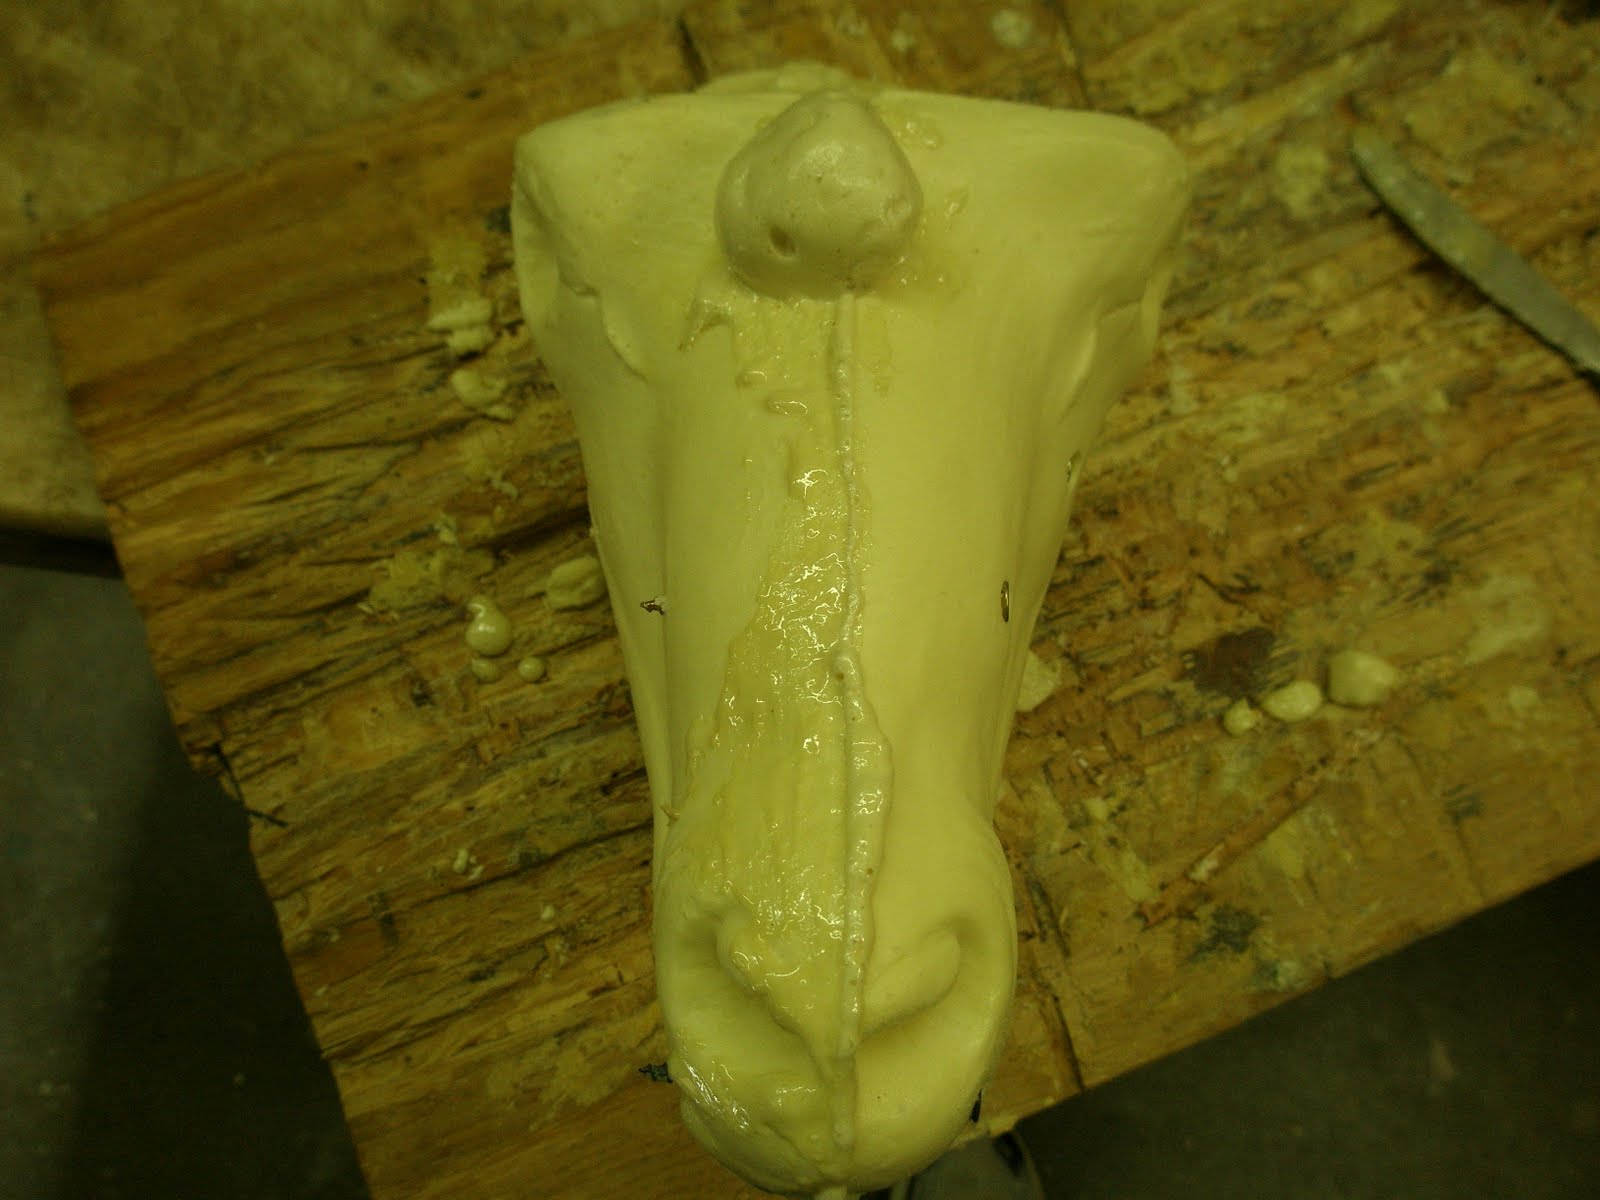
I screwed the skull in place and then foamed it in. Then I used bondo to get the area built back up so the skin would meet up with the horn. I have used heavy grit sand paper to enhance the detail on the head. I do this though out mannikin.
Here the rods are all installed and they are all on the same plain. In other words they are all parallel.
I have fit the skin on this mannikin about 12 times. I make adjustments until the fits right without stretching. If the skin is stretched out, it will shrink back. That is where all the drumming comes from. I have measured green skins when they first come in. I then salt and dry them. Ship them off to be tanned. Once they have came back, wet them down and remeasured. I will gain 10% in size do to the shaving process. Why do you want to stretch it 10% more.
Pay attention to detail. Stop guessing what you think the other taxidermist is doing. Call him up and ask him. He should not fear you, you are not going to damage his business. You are your own worst enemy.
I start sewing down the back and then once the neck is sewn, I start on the head. I set the eyes, lip, nose and glue skin around base of horn.
I placed the sheep on a base that has wheels. This allows me move it around the shop while we build the rock system.
We blue foam to start the rock shape. I use 2 part foam to foam the pieces together.
In future tutorials, I will explain in detail how we build rocks and give them their realistic color.
We build all of our hardwood cabinets. We have not found cabinetry on the market that is of a high enough standard.
Paying attention to detail and alteration will always pay off. Pricing your art work correctly will provide a profit.


No comments:
Post a Comment