Total Pageviews

Wednesday, November 9, 2011

CWD and your Trophies

Thursday, October 6, 2011

Prices........Food for Thought


Below is a letter I recently received from Shawn Joyce of Diizche Safari Adventures. I want to share this with my clients because it is written from a client’s perspective and touches on a very important topic. I believe it will be of interest to both my new and established clients.

 
Food for Thought
Today I was thinking about the joy I receive everyday when I view the mounted game in my home. To me each mount is a piece of art that captures the essence of a beautiful trophy that I have hunted. Through this art form the memories that surrounded the hunt are recalled and conveyed. For those who visit my home, they appreciate and enjoy the beauty of the animals. Visitors always want to learn more about the hunts, conservation through hunting, how the meat was utilized, and more often than not how the animal tasted. 
    
While reflecting on the enjoyment of my mounts I thought about the way my mounts were professionally prepared with the highest attention to detail. When I began building a trophy room to enjoy I did not at first find a taxidermist with whom I wanted to have a lifetime relationship. You see my first mount was a black bear. I went to a local guy that assured me I would get a great mount. What I received was a great mount with “his” level of skills and not what I have now come to know as a great mount.

After that experience I learned that you can’t take the word of well meaning friends and sportsman you meet about great taxidermy work. For many, the definition of a great mount is defined by how little they had to pay for it and not necessarily the quality of work. You have to educate yourself and learn what goes into making a great mount. You should visit professional taxidermist shops, look at their work, and ask questions. Another part of this process is to understand that you will get what you pay for. When you find a skilled professional taxidermist their time and labor equals money. The ingredients for creating the mount are the small part of the total cost equation.

The pricing of mounts can be misleading if you do not consider this aspect. For example, consider a typical deer shoulder mount where the price can vary from $500.00 to $850.00.  The question to ask is, why the difference in price.  The tasks involved when mounting a deer shoulder mount can be as detailed as the taxidermist wants it to be.  Of course the taxidermist must have the knowledge and skill to execute the details.

If a professional taxidermist advertizes a $500.00 deer mount, the plan is to assemble two deer a day. The taxidermist that is mounting two of these $500.00 deer will earn more profit per day than the taxidermist down the road spending two full days to mount one deer at $850.00.  Even without discussing the intricate details, you can see where the taxidermist spending more time on your mount will have the opportunity to create an accurate representation of your trophy. 
 
Why would a taxidermist spend two days mounting a deer, if it is possible to quickly mount two in one day?  The difference is the personal pride in the finished product. I have come to understand specifically what goes into making a great mount. I hope you will consider detailing this information on your blog for those clients that want to better understand.

Shawn Joyce
Diizche Safari Adventures


After reading this short letter from Shawn, I decided to elaborate a little on the difference between the $500.00 and $850.00 deer mount he described. This should give you a better understanding of the difference between the two approaches.
Elsewhere on my blog the hunter can find links to projects that were completed in a low budget shop.  They found their way here to be remounted.  This is a very costly and completely preventable problem.

I will outline a few short cuts that the so called bargain taxidermists typically do to lower the price and still make a living.  The first component deals with tanning. To save money they can send the skin out to a cheap tannery or they could tan the skin in house. 
 
The next component deals with anatomy.  To save time, which equates to money, he will not do any alteration for size, shape, or anatomy.  This taxidermist will order a manikin that is close and preferably smaller so the skin will go on quickly. There will be no attention paid to the age of the deer.  A deer that is 3 1/2 years old has a slimmer head than a 5 1/2 year old.  He does not know this, because he has cut the entire eye socket away.  He has no reference to head width or skull placement.  The name of the game is to attract the guy looking for a deal and give it to him. 
 
Believe it or not, this hunter is actually easier to please.  He will not complain about poor work or bad service.  Throughout my blog I have written many tutorials on this very subject.  Most of all remember that the taxidermist that produces a $500.00 to $600.00 mount cannot get $850.00.  The hunter should ask himself why.  The taxidermist is not short changing himself, only the hunter is being short changed.

You must remember that what sets apart an everyday or average mount apart from a great mount are all the details. These start with high quality professional tanning and then include proper anatomy based upon eye socket width and measurements, manikin alterations, antler placement and eye set just to name a few. These details and steps take time to execute and time equals cost to the final product. 
Dall sheep pinned and in the drying stage.

Wednesday, May 25, 2011

Preparing skulls for shoulder mounts

Though out our tutorials, we have made reference to skull placement and correct alignment.  Back in the 70's and 80's cutting the throat was a common occurrence.  As taxidermist we spend endless hours trying to educate the hunter in proper field care.  Nothing worked at all.  We had photos and descriptions of proper skinning techniques but it fell on deaf ears.  It was not until we started charging for the extra work and time,  that things began to change.

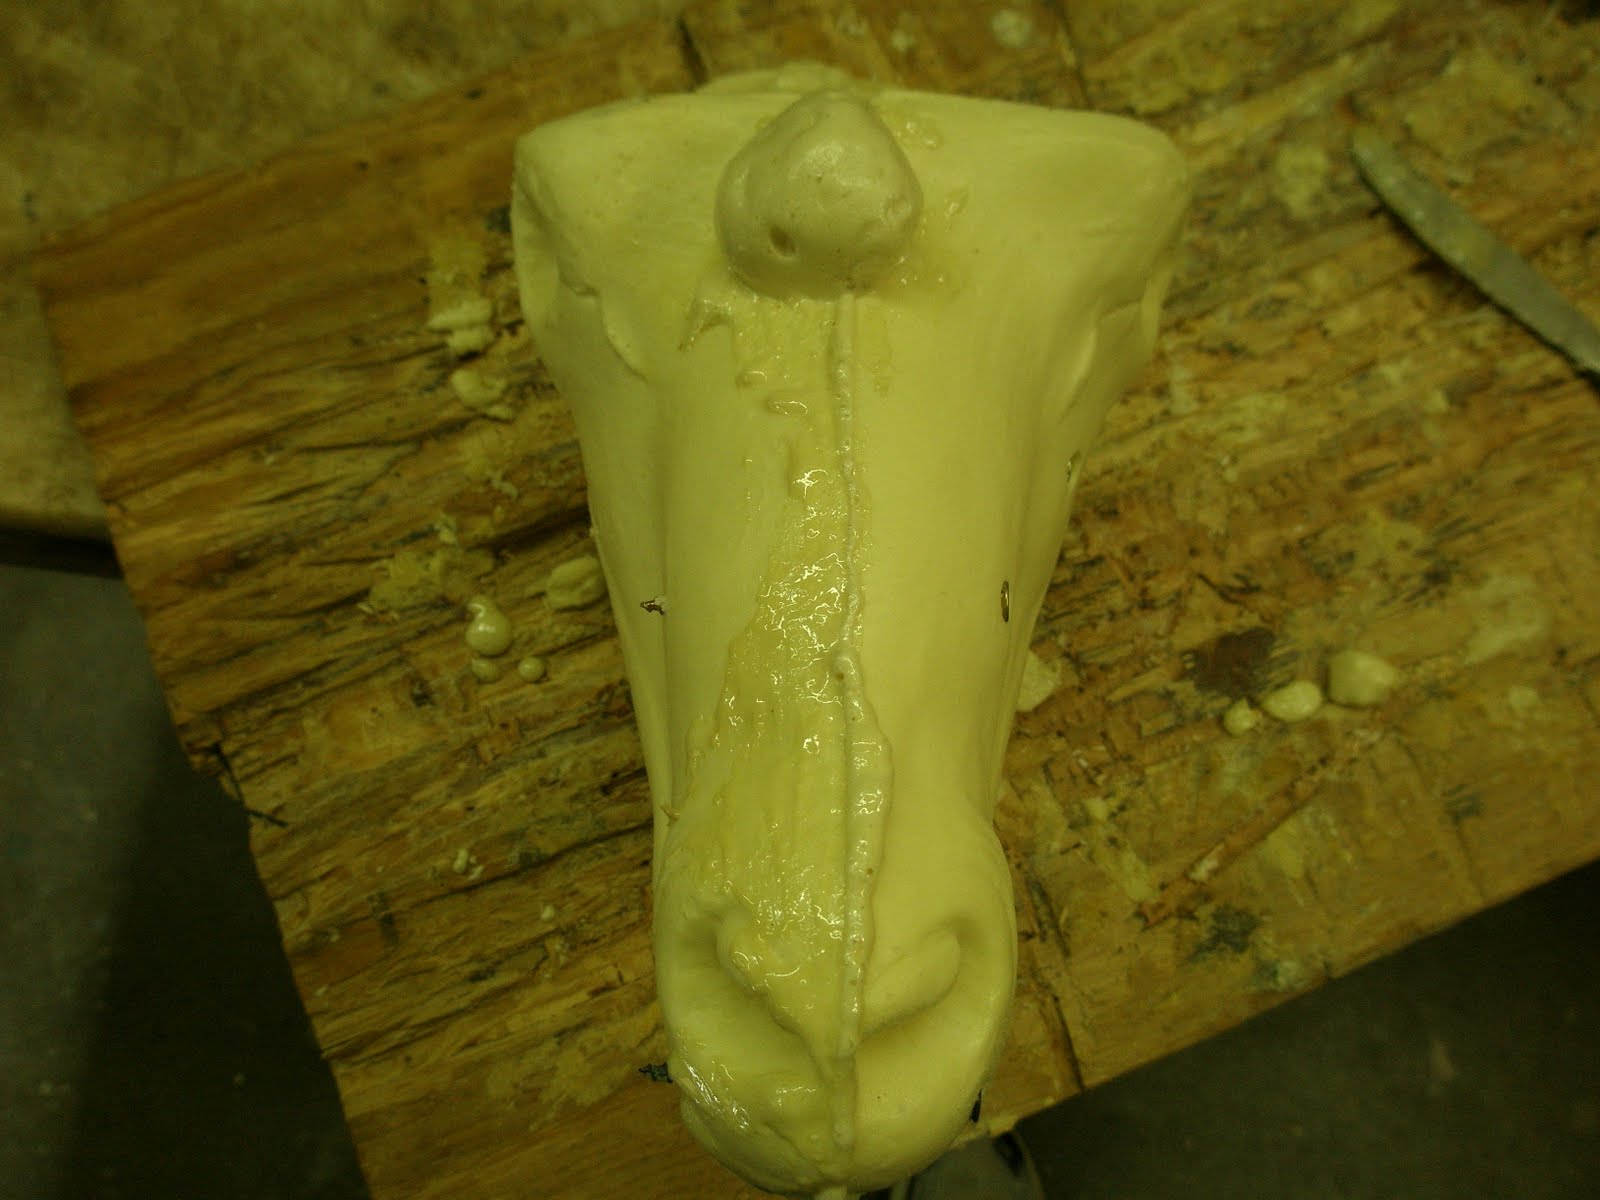
We are now at another cross road.  Since the finding of  Chronic Wasting Disease (CWD);  we now have uneducated people in the field cutting skulls and skinning trophies with the worst results in handling that I have ever seen in 36 years of being in business.  So you might ask; how can this be turned around.  There is only one way to get the hunter to want to stop and learn proper field care.  We will now begin to charge for the extra work it takes to fix these problems.  This will change the action and  attitude of the industry.  In the following photos, notice how skulls are cut and how they relate to the mannikin.  Most Taxidermists and guys doing taxidermy (and there is a difference) do not pay enough attention to the usage of skull measurements and placement.
 
Here is an example of a full time taxidermist who has cut this skull.  Our client harvested this Mule Deer in Colorado.  He took it to a local taxidermy shop where he found this full time professional taxidermist.  I find it hard to believe that this taxidermist cuts his own skulls in this manner.  This would make his job so hard to do, and do correctly.  Only thing I can say is that the taxidermist was mad that the hunter was taking his trophy back home to have mounted in his home state.  This is just an example of poor handling at its finest.


Here is what a skull cut in this manner gives you.  There is no skull to reference to the angle of the antlers.  Eye sockets are missing, so getting the correct skull width is also not an option. Attaching this skull to the mannikin is another problem.  As you see, skulls cut in this manner makes no sense.  This would be like trying to build a house on one prier block.  This is very unstable and everything is a guess.    


Notice here how the skull has been cut.  I have the bridge of the nose in tack to align up with the slope of the nose on the mannikin.  This will set the antlers at the correct angle.  There is no guessing here.  Next;  notice I have the eye sockets in place on the skull.  This is going to give me the correct width.


 The width of the skull is most important measurement to have when mounting any big game.  The eye to nose;  nose to the back of the head and neck measurement are second to skull width.  Most all mannikins are to wide in the head.  I am estimating over 95 %.  Believe it or not, this is the one measurement that most  taxidermist do not pay attention to. This limits there ability to produce high end quality mounts.  This will open the door for a new taxidermist to move in town and take over an area.  With this knowledge, he will be more accurate.  Now his prices can also be 30% higher, and he will still take the majority of the work.

   
 Here are the way skulls come from Africa.  Do you ever wonder why they send the whole skull.  This is to get all the measurements need to perform the job.  The width of the skull is there, along with length, depth and shape. This is very important on African game.  Well mounted African game will bring in the good clients.
Notice here, everything lines up.  There is no guessing.  We will end up with a natural looking deer.  Perfect these techniques and you will surpass your competition.  These techniques also bring in more profit and build a better client base.

Tuesday, May 3, 2011

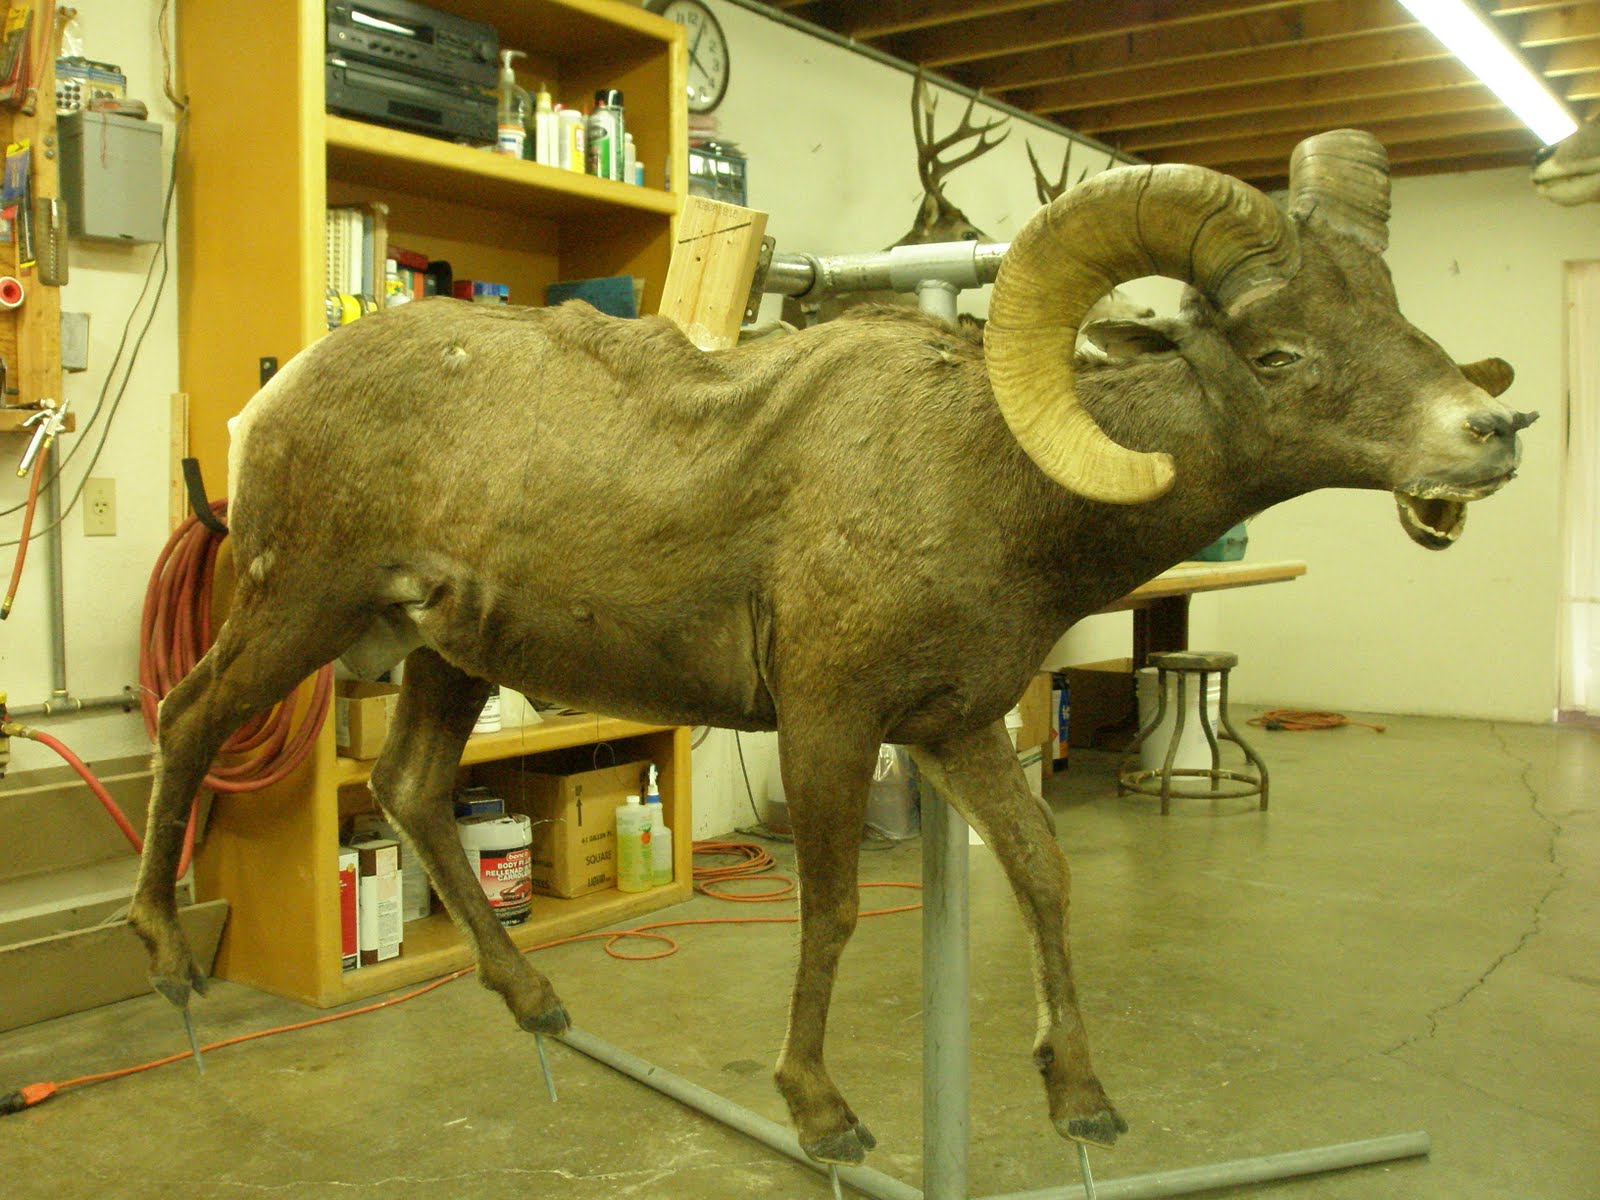
Bighorn Sheep Project

In this tutorial we will begin explaining  the proper steps to mounting a lifesize.  Instructing your client to dorsal cut his trophy is the beginning to a successful piece.  In the first photo, notice the mannikin has been ordered without rods.  We have wrote about this in the past.  We still get questions on how important is it to do this.  We never order mannikins with rods. Here we foam in a 2x4 so that it can be mounted to the stand.
Once I have established that the circumference is correct, we then foam in the block that we use for mounting purposes.  If the circumference needed to be adjusted, we then split the mannikin to add or subtract materiel.   We have place the block in the mannikin and it is now ready for more alteration.
Here is where a mannikin without rods become very easy to alter.  The legs on this sheep were out of line and needed to be corrected before moving forward.
This is the most misunderstood procedure in taxidermy today.  Not only is it misunderstood,  It is ignored, and the importance is disregarded.  Notice here the mannikin is 7 1/4 inches wide.  The skull on this sheep measures 6 1/8 inches wide.  The mannikin is 1 1/8 inches to wide.  Most all Taxidermist do not reduce the head size at all.  They like to say they do, but they do not even have the eye socket on the skull to measure to start with.  This is why most sheep mount are odd looking and do not hit the mark.
Here we have cut the head off the mannikin and split it down the center.  Notice the back has been reduce more than the front.  The muzzle was to wide also by 1/4 of an inch.
Here in the photo, look at the solid block of wood that is used as a head board.  This should be 1 1/8 inch plywood.  Solid wood will crack over time and allow for movement of the skull and horns.  This is a large well known company, and you can see that they also short cut where ever they can.  Look closely at the staple used to fasten the reinforcement board to the head board.  This just goes to show you that they have no intentions of the form being altered.  Even our suppliers are still in the stone age.  As a Taxidermist, if you plan on making a living at this;  you will need to perfect the art of alteration. 
I have foamed the head back together.  Notice the large difference in the shape between the altered head and unaltered one.
I can now position the head on the mannikin where I would like it to be.
I have decided to give this sheep a little head roll.  This will give the sheep some motion and interest.
Notice that I have the whole skull to work with.  I can get all my measurements from here and transfer them to the mannikin.  As taxidermists;  we should always have the whole skull in front of us.  Someone, somewhere started cutting skulls which has led to a very inferior and improper way of doing taxidermy.  The hunter can bring back any whole skull from any place in the world.  CWD has nothing to do with cutting skulls.  I always use a wire brush to remove all the brain tissue from the skull and that is the only requirement.  Skulls should never be cut in the field or by the hunter.   NEVER! 
Notice the sheep is on a stand.  This makes the mannikin much easier to handle.
I have begun installing the rods back into the mannikin.  I have made all my leg length and circumference adjustment need for the skin to fit correctly.  Applying the skin will be easy and the skin will fit perfect.
In the lower part of the leg, I use bondo to hold the rod in place.  bondo is stronger and it still can be glued to.
I use a drill bit in a drill to auger out for the rods.  Make this slot first and then bend the rod to fit.
I screwed the skull in place and then foamed it in.  Then I used bondo to get the area built back up so the skin would meet up with the horn.  I have used heavy grit sand paper to enhance the detail on the head.  I do this though out mannikin.
Here the rods are all installed and they are all on the same plain.  In other words they are all parallel.
I have fit the skin on this mannikin about 12 times.  I make adjustments until the fits right without stretching.  If the skin is stretched out, it will shrink back.  That is where all the drumming comes from.  I have measured green skins when they first come in.  I then salt and dry them.  Ship them off to be tanned.  Once they have came back, wet them down and remeasured.  I will gain 10% in size do to the shaving process.  Why do you want to stretch it 10% more.
Pay attention to detail.  Stop guessing what you think the other taxidermist is doing.  Call him up and ask him.  He should not fear you,  you are not going to damage his business.  You are your own worst enemy.
I start sewing down the back and then once the neck is sewn, I start on the head.  I set the eyes, lip, nose and glue skin around base of horn.
I placed the sheep on a base that has wheels.  This allows me move it around the shop while we build the rock system.
We blue foam to start the rock shape.  I use 2 part foam to foam the pieces together.
In future tutorials, I will explain in detail how we build rocks and give them their realistic color.
We build all of our hardwood cabinets.  We have not found cabinetry on the market that is of a high enough standard.
Paying attention to detail and alteration will always pay off.  Pricing your art work correctly will provide a profit.

Thursday, April 28, 2011
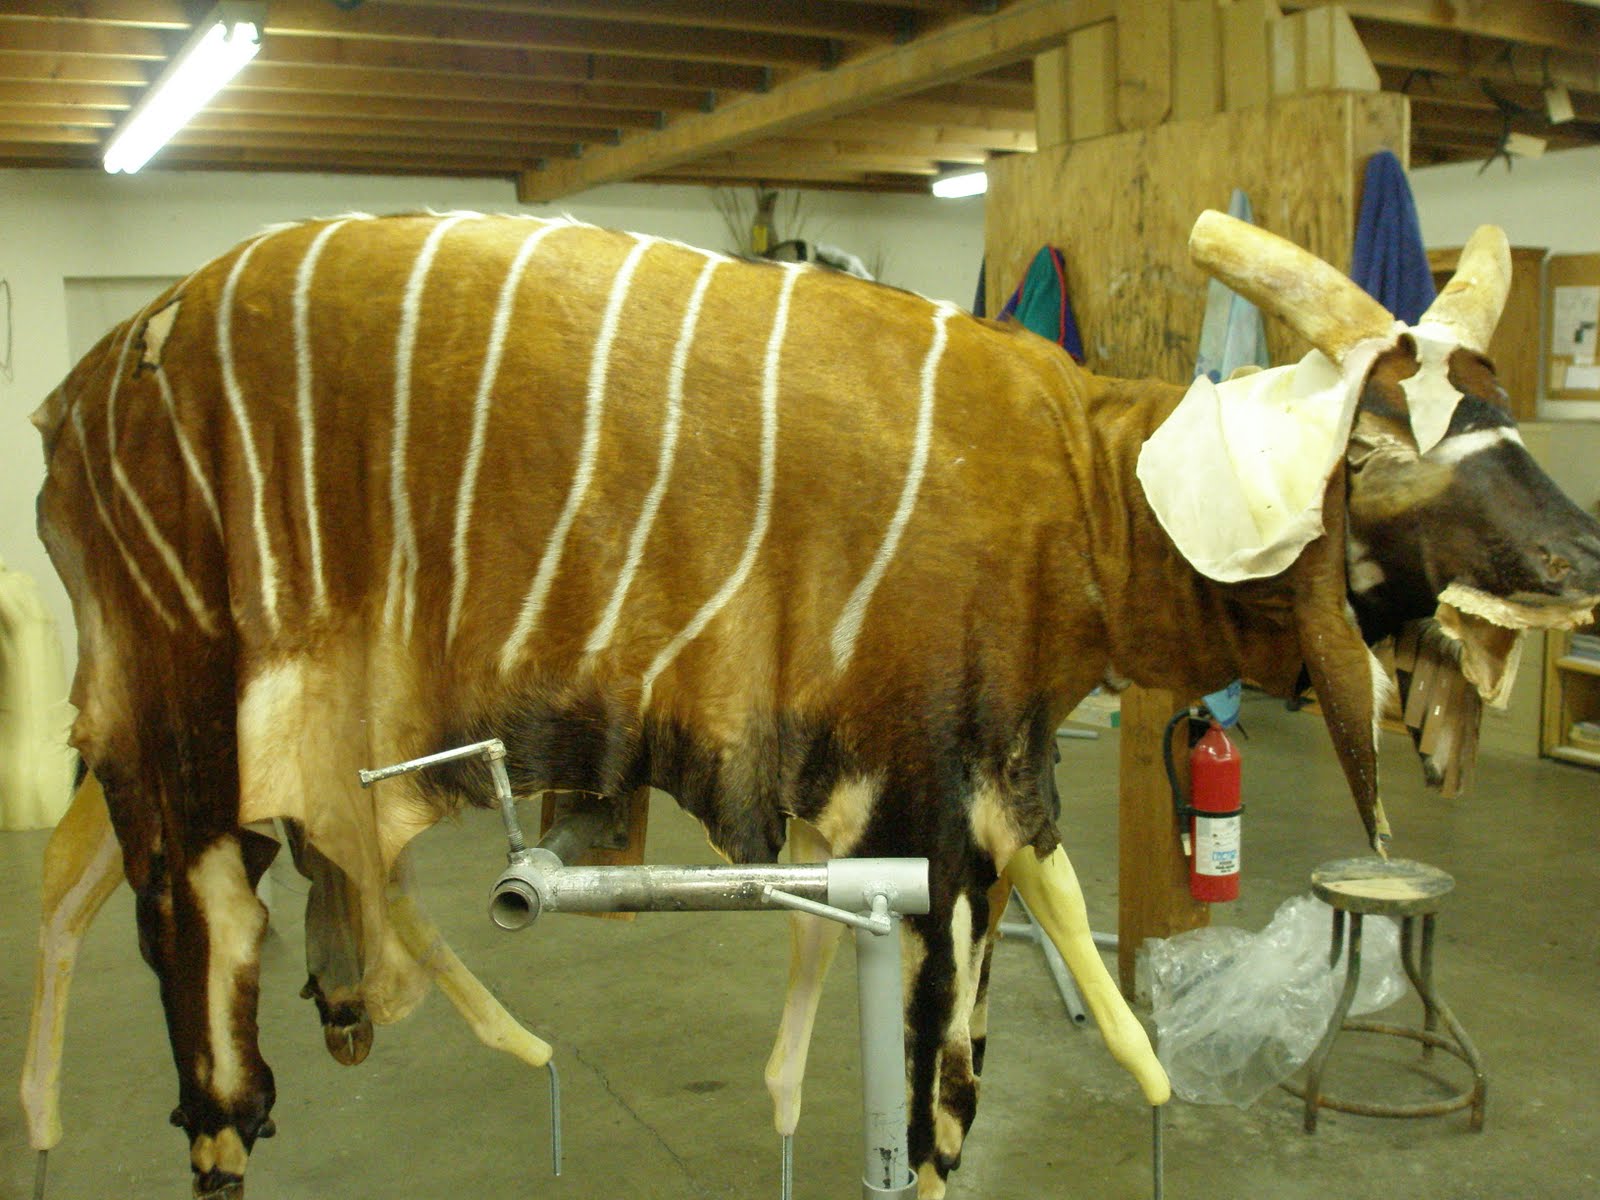
Bongo Project

In this tutorial we will be explaining the benefit of ordering life-size mannikins without the rods installed.  In this first photo, notice the mannikin has been made deeper from top to bottom by 1 1/2 inches.  The mannikin was also widen by 1 inch.  This gave me 5 inches more circumference that was needed.   
 Notice here,  there are no rods installed.  I needed to lengthen the leg between the first digit and the second digit. I also did the same between the second and third digit.  Not having the rod installed made this a very quick and easy task.
 I recently spoke to a representative at one of the major supply companies asking him why all mannikins were not made without rods.  His reply was that there was only a hand full of taxidermist that order forms without rods.  I found this to be very puzzling.  I then posted a thread on one of the major taxidermy forums stating this fact and how I found it was puzzling.  Sure enough, there was some egotistic ass that said that I was new to this forum and that they had been doing this for years.  According to the supply companies this is very uncommon to order mannikins in this manner.  Ordering mannikins with the rods installed is unacceptable in our business.   
 Here I have cut a slot so a thread all can be inserted in the mannikin once the alteration for size and shape has been completed.  Notice the front legs have also been altered for length and size.  
 Notice in this photo that there has been a 2x4 about 14 inches long foamed into the belly of the bongo.  This is how I mount it to my stand.  This way I do not have to fight to alter and mount the bongo as I move forward.
 Again, using the skull with the eye sockets attached will allow for perfect alignment. Removing the eye sockets from the skull just causes the taxidermist to guess at skull placement.
Here we are with the rods installed and the skull screwed in place.  We have altered for shape and size. 
 At this point, the skin should fit perfect.  If it does not, small alteration can still be made.
 The average alteration is 2 days.  Some times it may go three, but in two10 hours days the job of alteration can be completed.
 Here I have started with the head first.  Notice that there is plenty of skin to move around and get all the detail I am looking for.
 To form the winkles on the neck, I use paper pulp and body paste as a very thick slow drying product to form my detail.
 Things are beginning to shape up.  The skin moves very easily.  When the skin begins to dry,  The stitches will not come apart because I have not stretched the skin.  The skin fit the form correctly and the stitches have been glued down with epoxy.
Taking the time to order mannikins without rods will save time in the end.  Also the skin will fit correctly and be able to be taxied into place.  Leaning these steps will put more profit in the bank and attract more good clients.

Tuesday, April 19, 2011

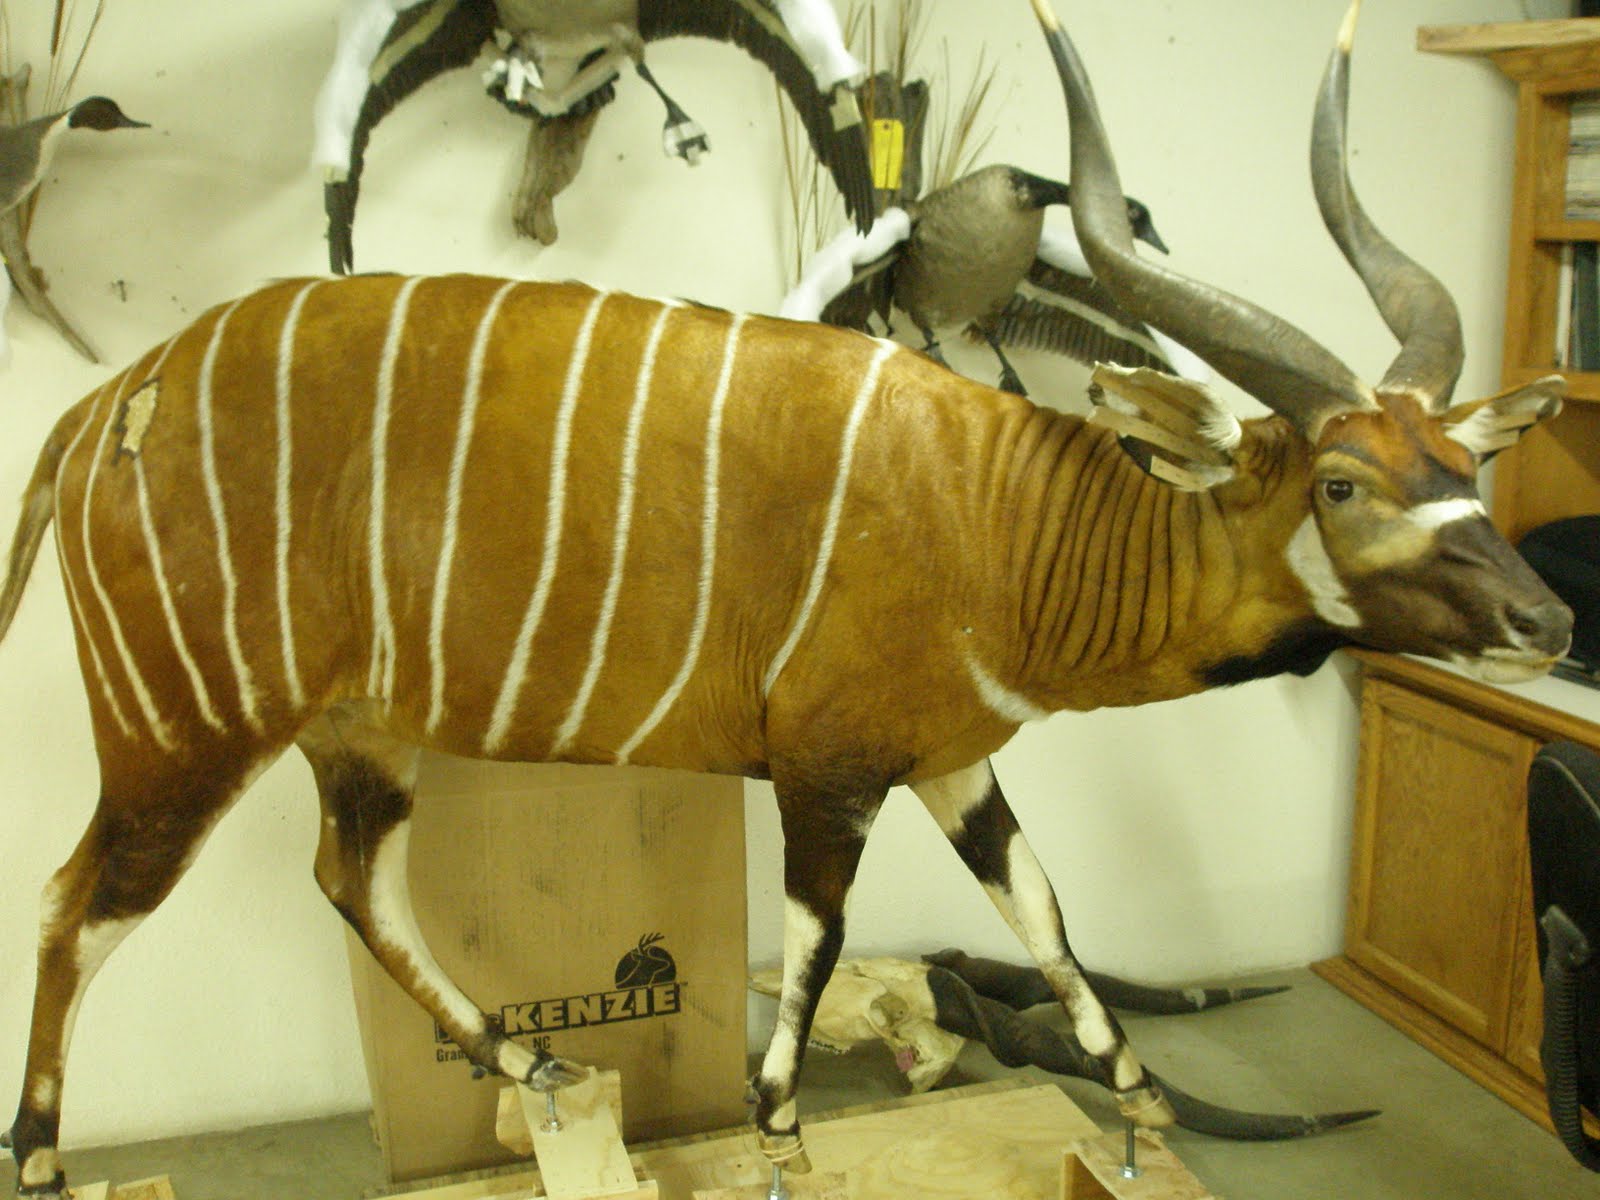
Remounting an Antelope

This is a antelope that we are going to remount.  We will walk through the steps explaining where mistakes were made and how you might avoid these on your mounts.
Notice here that the horns (skull) is leaning to far back.   We will find that the skull does not line up correctly with the bridge of the nose.  Also look how the lip is exposed.  It was not glued in place so the lip pulled during the drying period.
There is nothing right about the lip placement.  This is just poor craftsmanship.
Here you can see just how off the placement of this skull was.  I used this antelope in one of my last classes.  We found that every aseptic of this mount was incorrect.  
Notice that the eye set specs are not even close.  The skin was mounted right to the mannikin with no alteration at all.
When the client received his mount, the ear had this fold in it.  This is just poor work and total disregard for the client's trophy.  This is what you get when you look for a deal.  What a deal.
The taxidermist used paper-mach when molding in the skull.  This is not the material to use.  Paper-mach has no adhesion properties and nothing can be glued to it. 
This is a very important photo.  Here you can see that there has been no alteration at all.  The eye sockets have been cut off and the bridge of the nose is missing.  This causes the taxidermist to guess at skull placement.  As you can see he guessed wrong.
In the next few photos, you will see that there is no pin holes.  This skin was never pin in place, nor was there any glue used.

These areas has not been scuffed and no glue was used.  Notice there are no pin holes.
Here you can see that the head is to wide and needed to be split and reduced.
The skull also is to low on the mannikin.
Looking at the mannikin, you can see that the eye sockets on this form are just wrong.  This needs to be adjusted and mounting straight to the mannikin without a correction will produce a poor product.
  
Notice that the form is to wide in the back.  The mannikin is just to large in the head.  The neck might fit find, but the head will need to be sized.  Get this measurement from the skull.
This mannikin is just a poor mannikin to start with.  
Here is the finish mount.  Look closely at the eye detail.  The line of vision and eye angle set is important to get correct.  The antelope has a 9-11 degree eye set. This will give the correct look of an antelope.
Attention to skull width and eye angle set is the key to a life like mount.  Look at the before and after photos.  The difference is shocking.