Total Pageviews

Thursday, April 28, 2011

Bongo Project

In this tutorial we will be explaining the benefit of ordering life-size mannikins without the rods installed.  In this first photo, notice the mannikin has been made deeper from top to bottom by 1 1/2 inches.  The mannikin was also widen by 1 inch.  This gave me 5 inches more circumference that was needed.   
 Notice here,  there are no rods installed.  I needed to lengthen the leg between the first digit and the second digit. I also did the same between the second and third digit.  Not having the rod installed made this a very quick and easy task.
 I recently spoke to a representative at one of the major supply companies asking him why all mannikins were not made without rods.  His reply was that there was only a hand full of taxidermist that order forms without rods.  I found this to be very puzzling.  I then posted a thread on one of the major taxidermy forums stating this fact and how I found it was puzzling.  Sure enough, there was some egotistic ass that said that I was new to this forum and that they had been doing this for years.  According to the supply companies this is very uncommon to order mannikins in this manner.  Ordering mannikins with the rods installed is unacceptable in our business.   
 Here I have cut a slot so a thread all can be inserted in the mannikin once the alteration for size and shape has been completed.  Notice the front legs have also been altered for length and size.  
 Notice in this photo that there has been a 2x4 about 14 inches long foamed into the belly of the bongo.  This is how I mount it to my stand.  This way I do not have to fight to alter and mount the bongo as I move forward.
 Again, using the skull with the eye sockets attached will allow for perfect alignment. Removing the eye sockets from the skull just causes the taxidermist to guess at skull placement.
Here we are with the rods installed and the skull screwed in place.  We have altered for shape and size. 
 At this point, the skin should fit perfect.  If it does not, small alteration can still be made.
 The average alteration is 2 days.  Some times it may go three, but in two10 hours days the job of alteration can be completed.
 Here I have started with the head first.  Notice that there is plenty of skin to move around and get all the detail I am looking for.
 To form the winkles on the neck, I use paper pulp and body paste as a very thick slow drying product to form my detail.
 Things are beginning to shape up.  The skin moves very easily.  When the skin begins to dry,  The stitches will not come apart because I have not stretched the skin.  The skin fit the form correctly and the stitches have been glued down with epoxy.
Taking the time to order mannikins without rods will save time in the end.  Also the skin will fit correctly and be able to be taxied into place.  Leaning these steps will put more profit in the bank and attract more good clients.

Tuesday, April 19, 2011

Remounting an Antelope

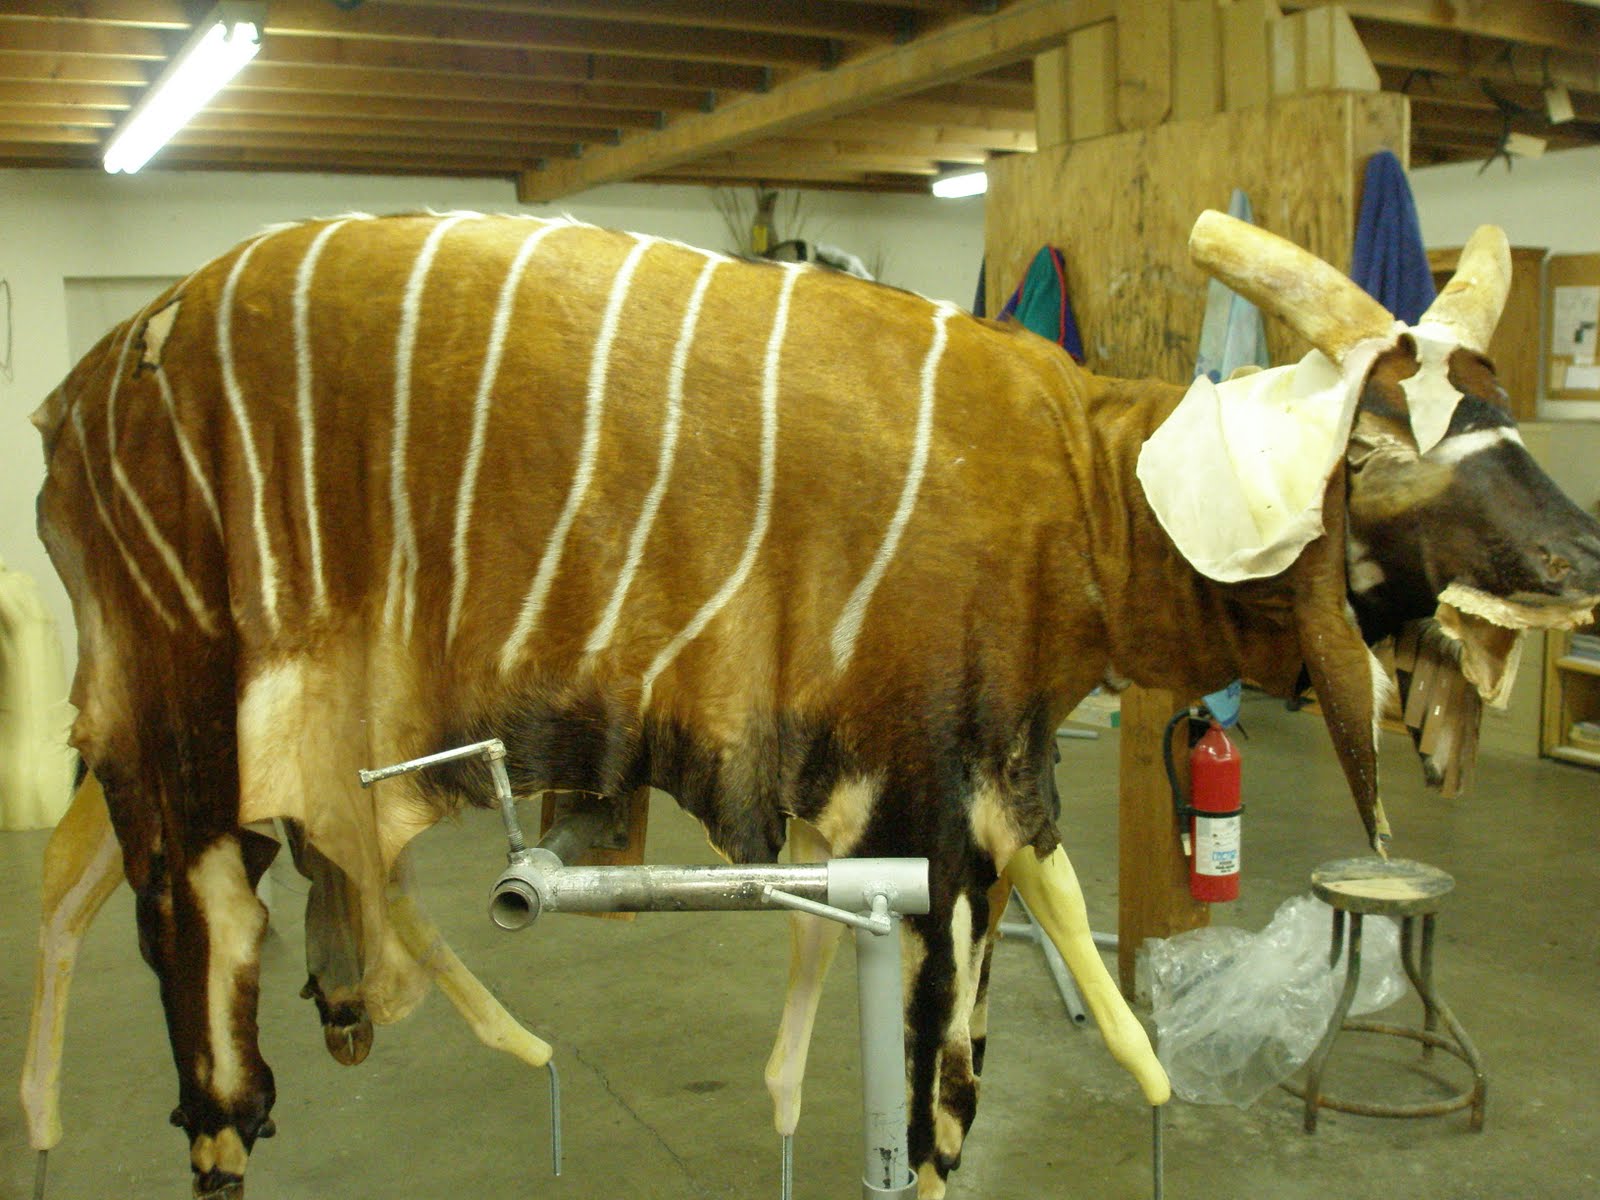
This is a antelope that we are going to remount.  We will walk through the steps explaining where mistakes were made and how you might avoid these on your mounts.
Notice here that the horns (skull) is leaning to far back.   We will find that the skull does not line up correctly with the bridge of the nose.  Also look how the lip is exposed.  It was not glued in place so the lip pulled during the drying period.
There is nothing right about the lip placement.  This is just poor craftsmanship.
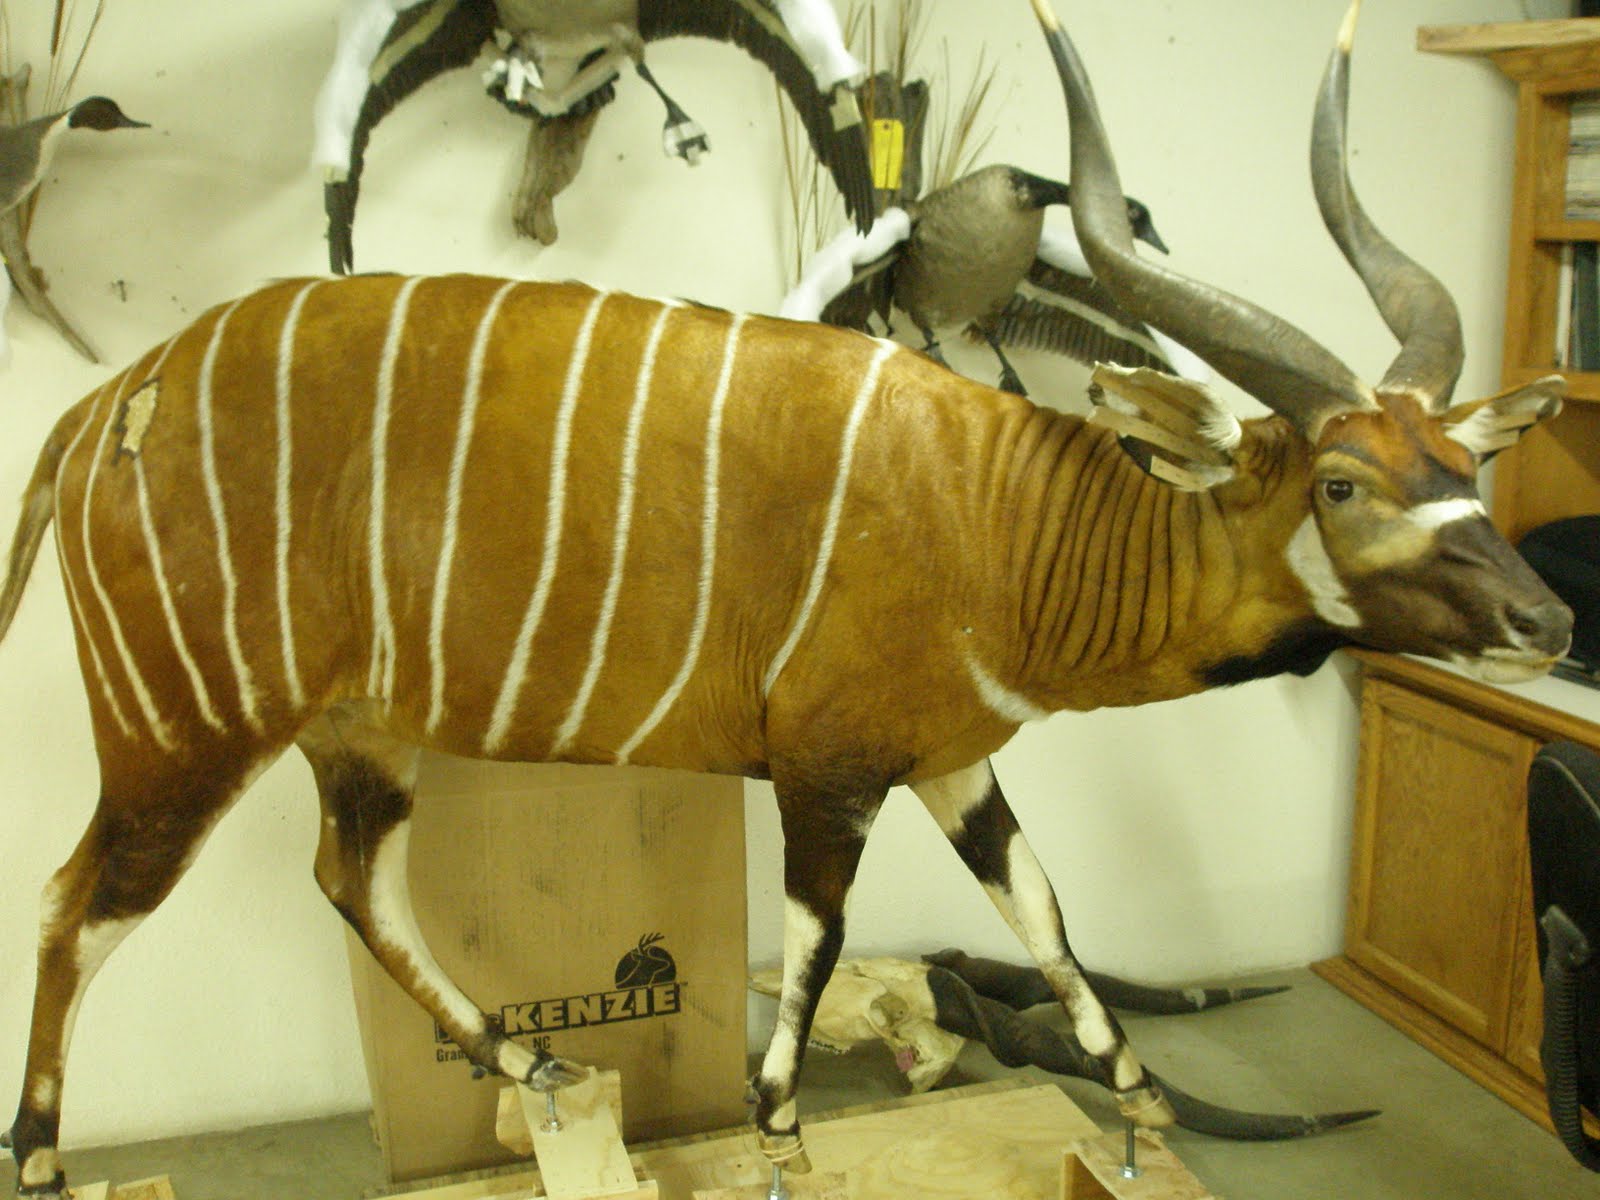
Here you can see just how off the placement of this skull was.  I used this antelope in one of my last classes.  We found that every aseptic of this mount was incorrect.  
Notice that the eye set specs are not even close.  The skin was mounted right to the mannikin with no alteration at all.
When the client received his mount, the ear had this fold in it.  This is just poor work and total disregard for the client's trophy.  This is what you get when you look for a deal.  What a deal.
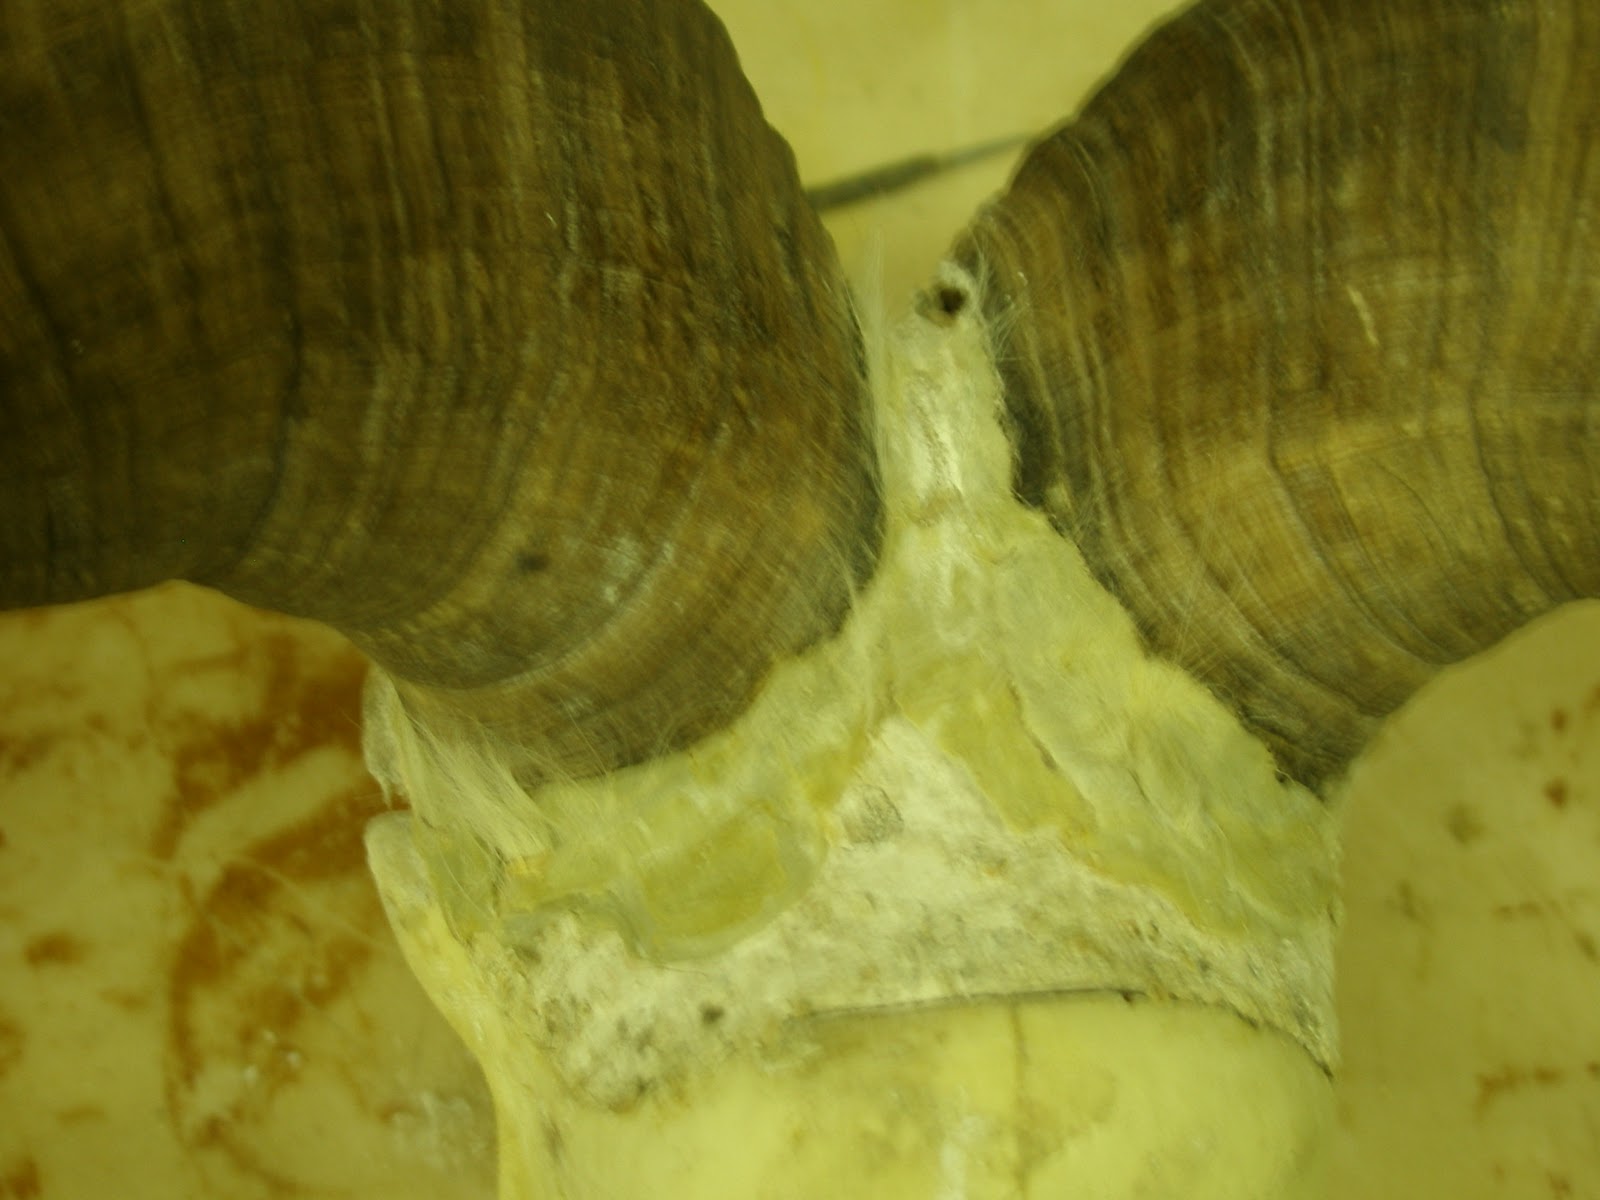
The taxidermist used paper-mach when molding in the skull.  This is not the material to use.  Paper-mach has no adhesion properties and nothing can be glued to it. 
This is a very important photo.  Here you can see that there has been no alteration at all.  The eye sockets have been cut off and the bridge of the nose is missing.  This causes the taxidermist to guess at skull placement.  As you can see he guessed wrong.
In the next few photos, you will see that there is no pin holes.  This skin was never pin in place, nor was there any glue used.

These areas has not been scuffed and no glue was used.  Notice there are no pin holes.
Here you can see that the head is to wide and needed to be split and reduced.
The skull also is to low on the mannikin.
Looking at the mannikin, you can see that the eye sockets on this form are just wrong.  This needs to be adjusted and mounting straight to the mannikin without a correction will produce a poor product.
  
Notice that the form is to wide in the back.  The mannikin is just to large in the head.  The neck might fit find, but the head will need to be sized.  Get this measurement from the skull.
This mannikin is just a poor mannikin to start with.  
Here is the finish mount.  Look closely at the eye detail.  The line of vision and eye angle set is important to get correct.  The antelope has a 9-11 degree eye set. This will give the correct look of an antelope.
Attention to skull width and eye angle set is the key to a life like mount.  Look at the before and after photos.  The difference is shocking.

Monday, April 18, 2011

Mule Deer Project

We have written on this subject in the past.  Here I will explain how and why I take the time in sizing the head correctly.  Generally, we order a mannikin with the neck size very close to the size we need.  I still adjust neck size, but find the the head width 85% of the time is incorrect.  Here you can already see that the mannikin is wider than the skull.  Most taxidermist cut the eye sockets off so they would not have a width measurement to reference. 
The mannikin is 3/8 of an inch to wide on each side.  This head needs to be reduced by 3/4 of an inch.  Once you reduce the width by 3/4 of an inch, you have also reduce the circumference by 1 1/2 inches.  Without this reduction,  you would need to steal  skin from some where. This is where achieving detail becomes impossible. Stop and learn to size the mannikin correctly.  This will allow you to produce a more accurate mount.  Once you master the craft, you will be able to get more money for the work you do.
Notice how wide the mannikin is at the back of the head.  This is why you see deer with their ares pinned back.  There was not enough skin to form correct ear butts and have the ears in a forward position.
Using the skull you can see that the bridge of the nose lines up with the mannikin.  Without the bridge left on the skull, there is no way to line up the skull and antlers at the right angle.  The taxidermist must just guess at the proper placement.
I measure the skull and find the width.
I have split the form down the center and reduce the width to match the skull.  Remember, If you see the eye sockets cut off, that means that the taxidermist is not taking into consideration the head size. In my shop this is not acceptable. 
Here I have adjust the width and now the skull fits perfect.
Notice the factory eye set.  It also was incorrect for this deer.  I need to make adjustments here as well.
Here the head has been foamed back in place and the skull screwed down tight.  I will now foam the skull in and shape the foam around the skull.
Using foam will give you something to glue to.  It also has adhesion properties to help keep the skull tight to the mannikin.
Here the eye is ready to be sculpted in place.
I have checked the skin for fit.
I will have enough skin to place everywhere it needs to be.  I do not have to stretch and steal skin from other areas.  The photo below shows the mount in a drying state.  Eye angle is correct and the skin fits tight to the burr.  Paying attention to detail will pay off in the long run.

Remounting a Dall Sheep

We will walk though the steps that I took to remove and remount this Dall sheep.  This is another example of a case where skull width was not considered and multiplied into many more problems.  There was a block of wood used as pedestal hardware.  This is what held the sheep up as a pedestal.  This is very poor  craftsmanship.  The area on the back was filled in like a rock.  That also will go. 
Looking from the front, the head is to wide and the muzzle has no detail.  This is because the mannikin was to large and there was not enough skin to adjust and create the detail.   Notice the ears are not even and are very poorly shaped.  I found that one ear-liner  was to large and had been folded over inside and left like that. The ear was not turned out all the way, and this became a problem with the fit.

Here I have been soaking the skin and removing it ever so slowly.  I found even more problems as I removed the skin. 
Looking close at the next few photos, there had been epoxy filled in between the skin and the horn.  This is because the mannikin was to large and there was not enough skin to reach the horn.  If this happens, it is because the head on the mannikin is to wide and needs to be split. 
Notice where the hair was pushed in to the epoxy to fill the gap.  This is where the problem should have been addressed to discover why things are not fitting properly.  Attention to detail and solving these problems increases your skill.  This is where you will earn more profit for the work being done.  
Notice here that the mannikin is wider than the skull.  This will cause problems with having enough skin to fit the mannikin properly.  Here the head needs to be removed and split down the center to reduce the width.
Another look from the top.  This is just unacceptable.  There was no thought put in to this project. 
Here it is noticeable that nothing lines up correctly.  This is how problems begin.  When the head is to large for the skin,  you will begin to steal skin and placing it where it does not belong.
More epoxy.  So the skin did not fit around the horn at any area.  The circumference of the mannikin at the head was so large that there was not enough skin.  In the tutorial Mule Deer Project, I show how the head needs to be cut and place back on the mannikin. 
Placing the skin after all the alterations. 
Notice here the skin fits around the horn base just as it should.
The muzzle width here was reduced and the skin can now fit the mannikin without drumming. 
Here you can see the head beginning to take shape.
From this angle, you can really begin to see a difference in the detail and overall shape.  Look back at the head we started with.  There was nothing right about that head.  Looking at the photo on the bottom, you can see separation between the bridge of the nose and the muzzle. This detail is important in achieving a life like look.  Looking at the base of the horn, you can see the skin fits perfect up to the base.  This skin now fits this sheep correctly.